
Last week, we explored how to make a music video without leaving the editing room. For its sequel, we’ll look at how to make the song underneath it. We’re about to get deep into the weeds of music making, and at some point, the eyes of non-musicians may begin to reflexively glaze over. But when I was starting out, I would search high and low for books and magazines on how rock and pop songs were constructed, and the above song is due in great part to information I gleaned doing my own detective work during the stone knives and bearskins pre-Internet era of home music recording. Hopefully budding musicians will learn a trick or two from what follows.
Thomas Edison famously said that “Genius is one percent inspiration, ninety nine percent perspiration.” When writing a song, the amount of inspiration often helps to reduce the perspiration necessary, but a fair amount of the latter is very often required.
As British music author Rikky Rooksby has written in his excellent book, How To Write Songs On Guitar, diving into writing a song requires one of three first steps: Songs are begun from the bottom up, starting with an interesting sounding drum loop or drum machine pattern. Or from the middle outward, starting with an interesting chord sequence on guitar or keyboard, or even an interesting synthesizer sound. And finally, from the top down, starting with an interesting lyric or melody.
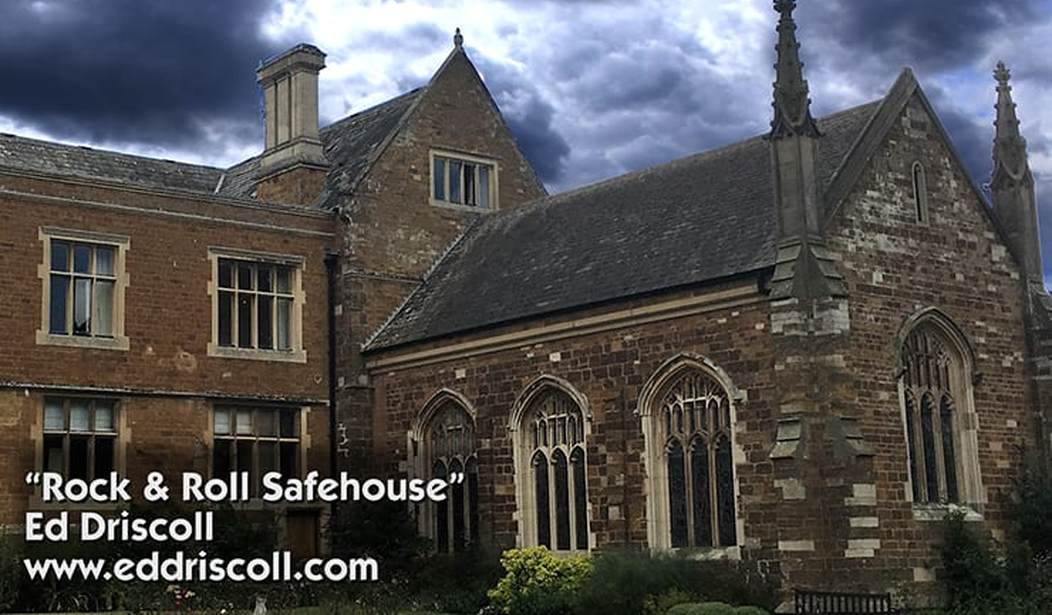
It was via that last method that I began “Rock & Roll Safehouse” last year. As I mentioned last week, I was inspired by a 2015 interview of Elvis Costello by the Wall Street Journal’s Marc Myers, that was included in his book Anatomy of a Song: The Oral History of 45 Iconic Hits That Changed Rock, R&B and Pop, in which Costello said:
Soon after I completed [1977’s “(The Angels Wanna Wear My) Red Shoes,”] I was signed to Stiff Records, a British independent label. Stiff sent me off to Headley Grange, about an hour and a half southwest of London, to rehearse backed by members of Clover, an American country-rock band that was in the U.K. to record an album. Headley Grange was a former poorhouse that became a rock ’n’ roll safe house where record companies lodged their bands and had them work on material before recording. It was cost-effective for them.
As I wrote in Part 1, the “rock ’n’ roll safe house” phrase was great; it also conjured up images of TV series like Miami Vice, where the cops are always hiding people out in an undercover “safehouse” before a case goes to trial. Headley Grange was where Led Zeppelin wrote or recorded much of their best material, including both “Stairway to Heaven” and “Kashmir,” and where Genesis wrote their breakthrough Lamb Lies Down on Broadway album. The phrase also evoked Nellcôte, the French villa where the Rolling Stones, as tax exiles, recorded much of their epochal 1972 double album, Exile on Main Street. Both locations conjured up mental images of rock bands under pressure (or at least enough pressure to add some drama to the song), surrounded by their roadies, hangers-on, and other louche types on the make.
As I was reading Costello’s passage, I immediately started playing with the phrase “I’m hiding out in the rock & roll safehouse,” and could hear background singers repeating the title “Safehouse!” as the hook in the song’s chorus. I started by opening my digital audio workstation (DAW), which in this case is Cakewalk’s Sonar Platinum (now called Cakewalk by Bandlab), finding a drum loop, laying down about eight bars of that loop, set the program to play endlessly in a loop, and playing with the tempo controls until I found a tempo that was appropriate for the lyric’s speed as I was singing it.
Once I had tempo set, I plugged in an electric guitar and created a chord sequence that worked with the lyrics, and then started experimenting with a chord sequence for the verses. To craft the melodies on the verses, I switched to the middle-out method of songwriting, plugging in an electric piano synthesizer patch, dialing up Jam Origin’s Midi Guitar plugin, to improvise a variety of melodies via my guitar synthesizer rig.
To do that, I set Sonar into its comping mode, which is one of that particular DAW’s most powerful features. It requires putting the program into a loop of a designated passage (say, eight or 12 bars length), and then at the end of the passage, Sonar will automatically loop back to its beginning, and make a new track, and it will do this forever, until your drive is full, or you hit stop. This has several possibilities: a supporting track can be played over and over again until it is near-perfect, and then the most accurate portions of each take cut together to create a perfect part. For solos and melodies, different melodic phrases can be experimented with, and then cut together afterwards. As musician-producer Brian Eno once said, “almost any arbitrary collision of events listened to enough times comes to seem very meaningful. (There’s an interesting and useful bit of information for a composer, I can tell you.)”
It took me several tries to assemble a melody and phrasing on the verses that I was happy with. I would get two bars I liked, keep them, and then a few hours later, or the next day later, improvise and find two more. This took a few days to find a complete verse melody that I liked, but I wanted the verses to feel like they belonged with the chorus, and I thought the chorus was strong enough to not abandon the song.
Dropping Acid with Joe Walsh’s Drummer
When it came time for the song’s instrumental break, I resorted to yet another method of composition – bottom up.
Back in the bad old days, recording a demo required using a phony-sounding drum machine. But since the late 1990s, variable tempo Wav files called Acid loops have allowed for professionally recorded loops of real drummmers whose tempos can be adjusted to suit a variety of song styles.
The drum loops I had built the song on top of were from Sony’s “Vital Drums: The Vitale Collection,” which are in the Acid format, which is compatible with Sonar. This means that Sony’s WAV audio files are controlled by the DAW’s tempo settings, and can be sped up or (within reason) slowed down without noticeable artifacts. The Vital Drums collection has about 30 or 40 different loops each of various types of drum kits played by Joe Vitale, Joe Walsh’s longtime drummer. The primary loops that I used for “Safehouse’s” verses and choruses began early on in the file list of a particular drum kit played by Vitale, and deeper into that file list, Vitale breaks out into much more flamboyant playing. I found these later loops to be too over the top than I wanted to underpin the song’s verses and choruses. But I thought they would be perfect for an instrumental break, with guitar solos dueling with the drummer. So I cut together a passage of Vitale’s flashier drumming that I liked, and kept that section of the song open for when I was ready to record solo guitar licks.
Recording into a DAW, particularly while the song is still in demo form, with just a single track of drums, a single rhythm guitar track and a scratch vocal track, it’s very easy to cut passages up, duplicate them, slide them around, and structure a song. This becomes more difficult (but not impossible) once many tracks have been recorded, so I try to structure a song with as few elements as possible. It’s also a good test — if the song works in just a raw demo form, it will likely still work once all the finished elements have been layered together. The reverse is very often less true — all the window dressing and ear candy in the world typically won’t salvage a badly conceived underlying song. (There are exceptions to this, of course.)
At this point, I had a rough drum track, a single clean electric guitar track playing the chords, and a single rough guide vocal singing the lyrics, which is a typical song demo form. In the old days (read: the 1980s) a demo like this would be recorded on a cassette four track, and then taken into a professional studio and re-recorded on a 24 track recorder, with a band fleshing out their songwriter’s broad strokes, and a producer suggesting various orchestration techniques.
However, a modern DAW allows for a completed song to be built right on top of the demo. What I had in mind for “Safehouse” was the sort of sound that The Who were getting on their 1975 album, The Who By Numbers, with lots of driving acoustic guitar, punctuated by occasional stabs of an electric guitar playing distorted “power chords,” and some boogie-style piano in the background. Plus lots and lots (and lots) of harmony vocals, to suggest the gang was “hiding out” in the safehouse.
Tuning into Nashville Tuning
In 2016, Sweetwater, the giant Indiana-based music retailer, released a video demonstrating a “Nashville-strung” acoustic guitar. It derives its name from being the equivalent of the upper octave strings of a 12-string acoustic guitar. For decades, Nashville producers would instruct their guitarists to play a conventional six-string acoustic guitar on one track, and the Nashville-strung guitar on another, and then hard pan those tracks to the left and right channel, to create a giant stereo 12-string guitar that envelops the listener. In the late ‘60s and early ‘70s, Keith Richards was a big proponent of the Nashville-strung guitar, employing them to double the riffs on 1968’s “Jumpin’ Jack Flash” and 1971’s “Wild Horses.”
As tempting as Sweetwater’s promo video was, I didn’t want to spend the money for a new Nashville-strung guitar. But fortunately, as I was flipping through the presets of my decade-old Roland VG-99 guitar modeling rig, I came across a preset called (ta-duh!) “Nashville Strung.” So I was in business.
But first, I recorded the more conventional acoustic guitar. I used my 2007 Gibson Everly Brothers J-180 acoustic guitar mic’ed with an AKG-C414 large diaphragm condenser microphone positioned about a foot to 18 inches away at the guitar’s 12th fret, and set in omnidirectional mode to capture a little of the acoustic guitar bouncing off the walls of my main studio control room.
I then plugged in my Roland-Ready Fender Stratocaster, and doubled that part with the Roland VG-99 on the Nashville Strung preset. Hard panned, the two parts sounded terrific together, and I knew I had the rhythmic bed for my song.
Adding Additional Instrumental Layers
For the electric guitar playing power chords, I used my 1998 Fender Nashville Telecaster. (It’s tuned normally; it just has the word “Nashville” in its name) I set the center and treble pickups out of phase, and recorded the parts through a direct injection box to another track. I applied Overloud’s TH3 amplifier modeling plugin, and dialed in a setting with enough distortion for some power, but not enough to flood the other instruments.
For the simple boogie-piano part, I used one of the many electric pianos in the venerable software synthesizer version of Korg’s M1 synthesizer. I’m not a very proficient keyboard player, and I ended up playing the chugging rhythm parts on my old M-Audio Keystation Pro 88-key MIDI keyboard, and the right-hand melodic flourishes via my Fender Telecaster through Jam Origin’s Midi Guitar plugin, recorded to separate tracks of the Korg M1 soft synth. However, because several of the melodic licks conflicted with the wall of vocals, I ultimately ended up trimming much of the right-hand filigree away.
The bass was a software synthesizer that reproduced the iconic Fender Precision Bass that was included with Sonar. Burbling just underneath the track is a synthesizer pad that was created using Korg M1’s Layer Pad. A pad, which is a modern day version of the string arrangements that were featured in the back of many pop songs in the 1960s, is designed to sweeten and warm up a song’s tone, without calling attention to itself.
Creating Atmosphere with Sound Effects
I’ve always enjoyed songs that began with sound effects to help evoke a mood. The original version of the Beatles’ “Across the Universe” begins with sound effects of birds singing, and a flock flapping their wings overhead to set its pastoral “one with nature” mood. “Back in the USSR” begins with the squeal of a Boeing 707’s landing gear touching down to set its mood and kick off the “White Album” with a bang. And I had loads of sound effects left over from my “Silicon Graffiti” video series which ran a few years ago here at PJM.
I wanted to use them to created a very short series of sounds creating atmosphere, but I also wanted to get into the song itself as quickly as possible. As the old cliché goes, “Don’t bore us, take us to the chorus,” and I wanted to get to that introductory chorus ASAP.
These sound effects were all sped up and/or time-shifted in Izotope’s RX6 audio restoration program. The sound of a muscle car pulling up came from a troop transport effect from a military-themed series of sound effects I had, but I used RX6 to first radically speed up and then lower its tone to suggest an exotic car pulling up. The speed of the footsteps were sped-up to suggest someone walking quickly. And I used a second track of stereo atmospheric sounds underneath to create the impression of being somewhere in the country, far from heavy traffic or other urban sounds.
Recording Vocals and Creating Big Harmonies
Once all the prep work was done on the backing instrumental tracks, it was time to record a lead vocal. This was recorded using my Peluso 2247SE large diaphragm tube condenser microphone, which, as I mentioned in my review last year, was inspired by the classic Neumann/Telefunken U-47 microphone beloved by Frank Sinatra, the Beatles, and many other acts. It has a top-end that cuts through a mix, and a fatness to its midrange sound that flatters many types of voices. It was plugged into Chandler Limited’s recreation of Abbey Road’s REDD.47 vacuum tube pre-amp, and then into Warm Audio’s WA-2A compressor, a recreation of the tube-based 1960s-era Teletronix LA-2A compressor. This vocal chain is a recreation of a setup that was used to record countless lead vocals in the 1960s through the early 1970s. It’s a fat warm sound, which helps to offset my rather thin singing voice.
To further beef-up my vocal, I double-tracked it using a method described by veteran musician and author Craig Anderton in a 2014 article at the Cakewalk Website. First, I duplicated my original vocal. Then, that second vocal track is run through Melodyne’s auto-tuning plugin and its rhythm and melody is very subtly shifted forward to make it appear to be a separate vocal. I enhanced this track by using Eventide’s 949 stereo Harmonizer plugin set to a .10 percent pitch shift and about 20 seconds of delay. (And yes, the first vocal was pitch-corrected using Melodyne’s auto-tuning function.)
When it came time to do the harmony vocals, I decided to have a little fun, even though I knew my experimentation wouldn’t really be audible. But it’s always interesting to experiment with a musical “science project” when recording a song. I recorded three tracks of backing vocals, each recorded in a different room, to subliminally enhance the theme of the song. The first was recorded in my studio control room, while I had the big Peluso tube mic still setup for the lead vocal.
The second backup vocal, I recorded in my studio isolation booth, using a much cheaper old Shure SM-58 dynamic mic. The third backup vocal, I recorded in the guest room that’s adjacent to the studio, placing a duvet behind me, and a Reflexion portable vocal booth in front. This last method was how I was recording my vocals in the den of my California home, and it was kind of fun to go back to the future.
All three of these backing vocals were run through various patches of my TC-Helicon VoiceLive 3 harmonizer. I then picked the best of these, and in combination with unprocessed copies of my voice, created the wall-of-sound harmony vocals on the song.
ehT esreveR ohcE tceffE
We’re getting ahead of ourselves in terms of production order, but also at the start of the song, to further enhance the atmosphere, I eventually copied the lead vocal track, reversed the opening “I’m hiding” words, and processed that phrase with Dunlap’s Echoplex reissue guitar pedal — and then reversed that — to create a ghostly echo before the lead vocal. This video by producer Ryan Earnhardt explains how to route audio out of a DAW and then back in to use guitar pedals as outboard effects. The video below by Larry Crane, the owner of Portland’s Jackpot Recording Studio, explains the reverse echo trick, a favorite of Jimmy Page on both vocals and instruments since the last days of the Yardbirds, and the early days of Led Zeppelin:
I also used the Echoplex to create vocal “drops” at key points in the song, a favorite trick of Pink Floyd (QED: “Us…us….us…and Them…them…them). For one of those, after recording the echo via the Echoplex, I used Melodyne to drop each successive repeat a tone or so downwards, to create what the old Eventide Harmonizers called the “Kamikaze Delay,” such as David Bowie’s classic “Fame..fame…fame…fame” break on, you guessed it, “Fame.”
Laying Down the Guitar Solo
Finally, for the guitar solo, I plugged in my Fender Nashville Telecaster, switched to the center and bridge pickups out of phase, and used its Stringbender, a mechanical device invented by Gene Parsons of the Byrds, that runs from the B-string of the guitar via a series of pulleys and springs to the front guitar strap peg, which raises the B-string up to a tone when tugged, to create a sort of Ronnie Wood-style raucous guitar break. This was again recorded direct, and processed with the TH3 plugin. I like using this approach particularly with the Stringbender Telecaster, as I can dial in just enough distortion to fatten up the guitar, but not toomuch that it begins to sound overly dissonant when playing multiple strings simultaneously (aka “double stops”) when soloing, and I can adjust the level of distortion after the solo is recorded to really dial it in.
And that was that. Yes, I know I went completely over the top recording this. But I knew the song had a good hook, and I wanted to orchestrate it as much as possible, and to see what my project studio and I were capable of.
In the 1980s, I recorded music on a cassette four-track recorder and shot movies at NYU on 16mm film and then edited the shots with tape and glue. To now have the technology to do all of that on a computer is powerful stuff indeed. I hope my liner notes have inspired to do something similar – or hopefully something even better.


Join the conversation as a VIP Member